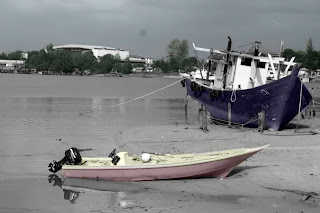
Image 1 (Glow Effects)
1. Open image.2. Make a white space at all sides of the image (Image > image canvas > change width & height
= add 200 from original image size).
3. Modify image background by inserting a new layer. Select background of image by using
magnetic lasso & polygonal tool.
4. Draw your own background by using gradient tool / eraser tool / burn tool.
5. Apply layer style (layer > layer style > drop shadow/inner/outer and bever emboss).
6. Make a glow effects by inserting a new layer (*Different glow effects must be in different layer).
Make sure that your background is more darker if you want to show the glow effects.
7. Define brush (click on brush tool > select calligraphy brushes from brush properties > change
brush size into 28).
8. Customize brush a bit further (Window > brushes>tick shape dynamic > in control, choose pen
pressure).
9. Set foreground to white.
10. Select pen tool, make sure that path is selected . (‘Path' is to create a single line).
11. Next, click and draw line around the body of image. Then, we will fill in the line by right click and
select stroke path ,select brush and tick simulate pressure.
12. Add layer style and select outer and drop shadow (you can choose your own color, opacity and
size).
13. Remove unwanted section on line by using eraser tool.
14. To make another glow , you can use the same process as before, but you need to use different
layer.
15. Save file.
BEFORE
AFTER

Image 2 (Mirror Box Effect)
1. Open image
2. Crop image into perfect square.
3. Make 4 copies of the layer (layer > duplicate layer).
4. Increase the canvas size (image > canvas size).Change width and height into percent and increase to 150 size of width and height. (You will get a white space around your image.
5. Select move tool and choose layer 1 and drag image to right side from main.
6. To make a mirror effect, click edit>transform>flip horizontal. The edit it by using free transform and squeeze the image to cover the white space.
7. Then, choose transform>perspective.
8. Next, use the same process on the next 3 layers.
9. Choose some of the layer to make it darker / brighter. (Image > adjustment > brightness/contrast).
10. Select background layer, select filter > render> lens flare to give more effect on mirror image.
11. Save file.
BEFORE
AFTER
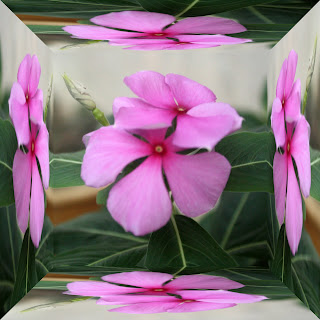
Image 3 (3D Photo Ball)
- Make a photo ball image (file> automate > contact sheet II > browse your image (select 25 images) > size the document (height & width = 6 inches) > untick (flatten all layers, auto-spacing [set 0 for vertical & horizontal, rows & columns = 5], rotate for best fit, use filename as caption > click ok.
- Your image have been put in white area, then arrange your images by using move tools & tick auto-select. Move & arrange your image. Make copy in each of the image to cover the white space (select move tool > press alt and click on any image and drag).
- Combine all layers (layer > flatten image), you will get a single layer on layer property.
- Select elliptical marquee tool and draw a circle. Then, copy the circle and paste (a new layer of elliptical image).Delete the previous layer.
- To make the image look in 3D, use filters (filters > distort > spherize > ok).
- Select elliptical (ctrl + click background layer) > Insert a new layer > select black foreground color > edit > stroke > change width = 100, tick inside)
- Select filter > blur > gaussian blur . Use white foreground and select brush and tick on the center of image to make it shine.
- Select layer > merge down.
- Open another image to make as a background or you can create new image and design your own background with gradient tool.
- Drag your 3D photo ball image into the background.
- Next, select layer > copy layer.
- Make a reflection of 3D image, (edit > transform > flip vertically). Put it below the 3D image and use eraser to to erase some of the space to make it reflect.
- Save file.
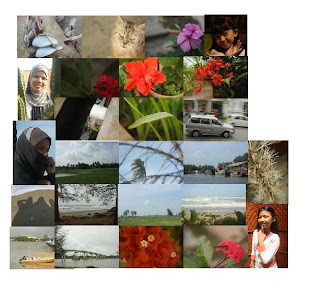 AFTER
AFTER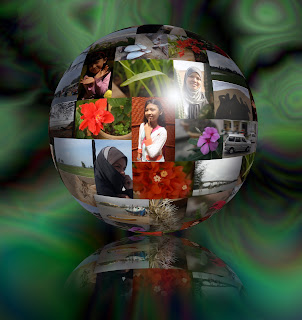
Image 4 (Polaroid Image)
- Make a Polaroid frame ( File > new > width & height = 1000 pixel .ok).
- Press ctrl + I (to make white space color to black) and choose white background.
- Select image > canvas size width & height = 1100 pixels > ok.
- Select image . canvas size > height = 1300 > click top center anchor >ok.
- Double click background layer >ok.
- Click magic wand tool > click on black area > press delete (to get transparent inside frame).
- Select layer > layer style > bevel & emboss > soften it >tick and click pattern overlay > patterns > colored patterns > white texture.
- Select new empty layer > layer > merge visible.
- Select image > adjustments > levels > choose to grey color.
- Select > select all > copy. Then, file >image > paste.
- Use free transform to put from at any area of the image.
- Insert another frame (layer > duplicate layer).
- Select background layer > select all > copy.
- Select edit > fill > white.
- Click on each frame layer > use magic wand tool > paste into.
- Use pattern to fill the white background.
- Save file.
BEFORE
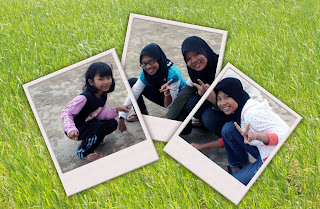
Image 5 (Mosaic From One Photo)
- Open image. Insert new file.Make a grid pattern (File > new > width & height = 500 pixels.
- Select > select all > edit > stroke > width = 1px and tick inside.
- Select edit > define pattern > save & close.
- Insert new layer, select edit > fill > select pattern that you have created before (grid).
- Press ctrl + I (to make it black).
- Use crop tool to remove uneven area (you will get 7 x 5 image).
- Separate each square to each layer. Use magic wand & select the first square > copy > paste in each layer. Do this to the next 34 layer.
- Use shortcut using Actions. Select Window > actions > create new action > name it > click record.
- Click on background layer > press ctrl + J (to copy selection into new layer) > press 8 (to make layer opacity = 80%.
- Click on grid layer (top layer).
- Click stop button.
- Click on second square using magic wand tool > click action (created before) . click play button. Repeat this process until the last square.
- Make a new layer and fill it with white (the picture will look washout and has a white line).
- Click move tool > tick auto-select. Start click at center square of the image and arrange it (make it overlapped with each other).
- Style the layer, on top left corner square > select fx at layer properties > select drop shadow > hold the key on the fist layer and drag fx down to every single layer.
- Click on any of the square and press ctrl + J (make it a little bit darker).
- Save file.
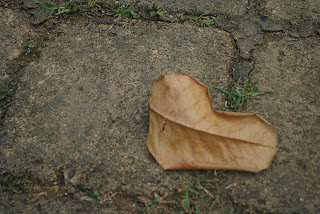
BEFORE
AFTER
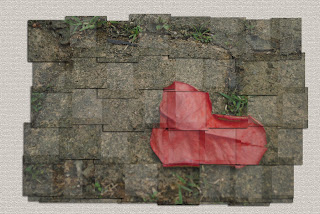
Image 6 (Soft colorize of Black & White)
- Open image image.
- Make a black and white image (select image > mode > grayscale).
- Add new layer (Layer > new >layer)
- Make a color for some images. Select brush tool. Pick your brush size and color .
- Color some of the images with the color that you chose.
- Select eraser tool to remove unwanted color.
- Drag opacity to make soft color.
- Save file.
